Sunday, March 14, 2010

4C: Canyon Ambush

Not willing to give up their prey, the Tusken Raiders have chased Luke and Ben Kenobi to Beggar’s Canyon. The heroes must fight to make it out alive…

Map: Beggar’s Canyon (Mushroom Cavern from D&D)


Set-Up: Luke’s Landspeeder starts at the Canyon Entrance; the Fringe squad starts at the Rock Outcropping.

Victory Conditions: The Fringe squad must defeat Luke’s Landspeeder. Luke’s Landspeeder must exit the map through the squares marked EXIT.

Special Rules: The Fringe squad can respawn any defeated character at the beginning of the next round. During each phase, the Fringe player activates only one character. The Rebel player can pass his turn without activating, and activate during a later phase that round. NOTE: For this scenario, treat Luke’s Landspeeder as a Huge character.

Special Terrain:
Spike Stones: Spike Stones count as low object terrain. When a character enters a square that contains Spike Stones, it takes 10 damage. For Large or Huge characters, this is counted at each step of the character’s movement, not each new square entered.
Quicksand: Quicksand is treated as difficult terrain. Each times a character activates while occupying quicksand, it must make a Save 6 or take 10 damage. For Large or Huge characters, it makes one save regardless of the number of quicksand squares occupied.

Rebel /47

Luke’s Landspeeder /47 (rebased as Huge)

Fringe /49

Tusken Raider on Bantha /22
Tusken Raider Scout /11
Tusken Raider Sniper /8
Tusken Raider x2 /8

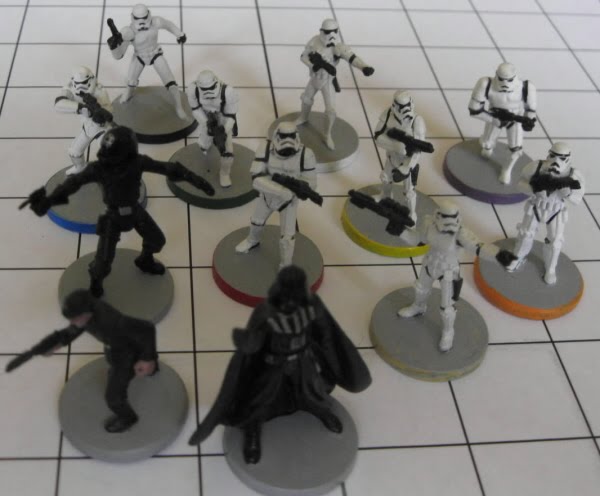
4B: Hostile Boarders

The Rebel Blockade Runner Tantive IV has been boarded by Imperial Stormtroopers, led by the dreaded Darth Vader. Princess Leia must ensure that the stolen Death Star technical plans are not recovered by Vader, or the Alliance is doomed…

Map: Tantive IV (custom, not finished)

Set-Up: The Imperials start in the Boarding Party area. The Rebels start on the Bridge.

Victory Conditions: During set-up, the Rebel player secretly designates one character as the Stolen Plans Carrier. Place a Stolen Plans token in the back of this character’s card sleeve. If the Carrier ends its turn in an Escape Pod square, the Rebels win. If the Carrier is defeated, the Empire wins.

Rebel /132

Rebel Captain /21
Rebel Heavy Trooper /11
Rebel Honor Guard /10
Rebel Pilot x2 /20
R2-D2 /8
R4 Astromech Droid /8
R7 Astromech Droid /8
Leia Organa, Senator /7
Elite Rebel Trooper /7
C-3PO /6
U-3PO /6 (copy of C-3PO)
Rebel Trooper x4 /20

Imperial /132

Darth Vader, Dark Jedi /55
Imperial Officer /14
Stormtrooper Officer /14
Imperial Engineer /9
Stormtrooper x8 /40

Star Wars: A New Hope, Episode IV, Chapter 1: Desert Incursion

Yeah, I'll do away with the overly long titles. This one came about as a way of using the Biggs mini. Played through it once, liked it.

Sandpeople from the Jundland Wastes have herded a young Krayt Dragon into town to distract the locals while they raid a storage facility. Biggs, Luke and some Rebel sympathizers want to show up the Imperial garrison by repelling the invaders themselves; the Imperials simply want to subdue the Tuskens before things get out of hand…

Map: Tatooine (Ultimate Missions)


Start Areas: The Imperials start in the Barracks; the Rebels start in the Loft. The Tuskens start along the opposite edge of the map, outside the buildings. Each player activates only one character each phase.

Victory Areas: The Storage Building is a victory area for the Fringe squad. The Fringe player scores 5 points for each round he has a character inside the building.

Victory conditions: The game ends when only one squad is left, or when a squad scores 100+ points at the end of a round. The squad with the highest points wins.

Special rules: Until all of the Fringe squad has been defeated, the Rebel and Imperial squads are neutral toward each other; they can’t target or attack characters in the other squad. They only score points for defeating characters on the Fringe squad. Once the Fringe squad has been defeated, the Rebel and Imperial squads become opposing and can score points for defeating each other.

Rebel /59

Biggs Darklighter /26
Luke Skywalker, Rebe l/17
Ithorian Commander /11
Bith Rebel /5

Imperial /59

Sandtrooper Officer /20
Sandtrooper on Dewback /15
Sandtrooper x3 /24

Fringe /109

Young Krayt Dragon /50
Tusken Raider on Bantha /22
Tusken Raider Scout /11
Massif /10
Tusken Raider Sniper /8
Tusken Raider x2 /8

Star Wars Miniatures overview

I have assembled 27 scenarios covering the Original Trilogy. These scenarios were designed initially as an intellectual exercise, following these two guidelines: They must be playable by a collector who has only one copy of each mini per set; and they must use all available versions of each character. The reason behind the first guideline is to keep me from buying hordes of cheap minis I'll never actually use, which is a mistake I made with D&D Minis. I've fudged a bit on both guidelines actually, but it's worked out nonetheless.

I've begun playtesting these, and so far the few I've played through have been pretty fun. It's more likely that if I make any changes, it will be by adjusting the victory conditions rather than the cast of each scenario.

There's one last set of minis coming out in a month, and it only has a handful of RotJ minis, so I feel comfortable calling this project complete with the proviso that it's always open to further alteration as things develop.

I'll be doing a post for each scenario, with pictures as time allows.

Tuesday, January 12, 2010

Goliath


Goliath (Josten), with Wonder Man for scale
One of the minor changes I made is that Giants are no longer considered adjacent to characters 2 squares away. I don't know if HoT rules already fixed this or not. My Giants are only adjacent to adjacent squares, but are allowed to make close combat attacks up to 2 squares away.

Marvel Infinity Challenge

I've been wanting to get my custom superheroes rules up for a while now. Rather than post a 14 page rules book, I'm going to just detail the ways my version differs from the published WizKids game.


The most obvious is that I don't use clix bases. I translate them into stat cards. There are a number of advantages to doing it this way, which I'll demonstrate as I go. Here's a sample of the cards for the Warriors Three:


Action tokens and special tokens are placed on the cards rather than on the map. Carried characters and objects are placed on the cards. Damage is tracked by simply ticking off the Hit Points column to the left with a dry erase pen. A separate set of cards details the standard powers (in place of the PAC), each character with white powers has a card for those, and there are cards detailing traits and team abilities.

I found I no longer needed to tie team affiliation directly to team ability. I simply gave each TA a name, and listed that ability below whatever team affiliation I saw fit to assign. For example, all of the New Warriors cards read "Team: New Warriors", and below it, "Team Ability: Wildcard". The X-Teams (Gold, Blue, Factor, Force etc.) have their own different team affiliations, but almost all of them have the Sacrifice team ability.

Since the Marvel and DC Us are so vast and my resources so limited, I decided to restrict myself to one specific period in time for each universe, with only one version of each character. For Marvel, it's the early 90s starting with the X-Men relaunch; for DC, the late 90s / early 2000s up until the Crises. I thought the existing starter names fit them perfectly: Marvel Infinity Challenge and DC Hypertime. At some later point, I'll post a list of all characters for each, and which version of each character I chose.

With these limits in place, it was relatively easy to assign an 'alignment' - Hero or Villain - to each character. This affects force building, since your force must be all Heroes or all Villains. Sandman is a good example; despite being a villain most of his career, he reformed briefly and joined Silver Sable's merc group, so he's listed as a Hero. Some characters have abilities analagous to the Warband Building abilities found in D&D Minis; for example, Majestrix Lilandra is a Hero with an ability called Empress which lets you include Villains from the Imperial Guard and Shi'ar Imperium teams on her force. Balder has an ability that brings Karnilla from the Villains' side to the Heroes. Scenarios can also change around these rules as necessary.

The biggest mechanics change is the turn structure. Rather than having a given number of actions, each player has a given number of turns - one for each 100 points. Once both players have used all their turns, the round ends and all action tokens are removed. Thus every character can be given an action each round, and there's no such thing as pushing. To enable things like activation clicks and 'sweet spots' to work, every character can double-time when given a move action (Give this character a move action. Move it up to twice its Speed value. Once the move action is resolved, deal it one unavoidable damage).

I kept soaring. It's a simple and fun mechanic. However, all changes in elevation cost 2 movement; this goes for range as well. A grounded Bullseye shooting a soaring Storm simply deducts 2 from his Range value, rather than halving it. Same with shooting to or from the edge of a building.

Another big change is the Defense roll. You'll notice on the Warriors Three cards that their DVs are lower than normal. That's because when an attack occurs, both the attacker and the defender roll 2 dice. Only an attacker can crit or fumble (crit miss). The attack roll result has to beat the defense roll result for the attack to land. I made this change mostly so that the defending player can feel like he's actually doing something rather than waiting to see if he got hit or not.

I made a few other minor changes here and there, and I'm trying out some new things, like group activations for minion types. Characters with Imp/Inv go through a thin wall instead of stopping in front of it when knocked back, that type of thing.

I'll post my character lists shortly.

Sunday, January 10, 2010

Bone battle


Wolverine vs Marrow